Before and After: Odds and Ends

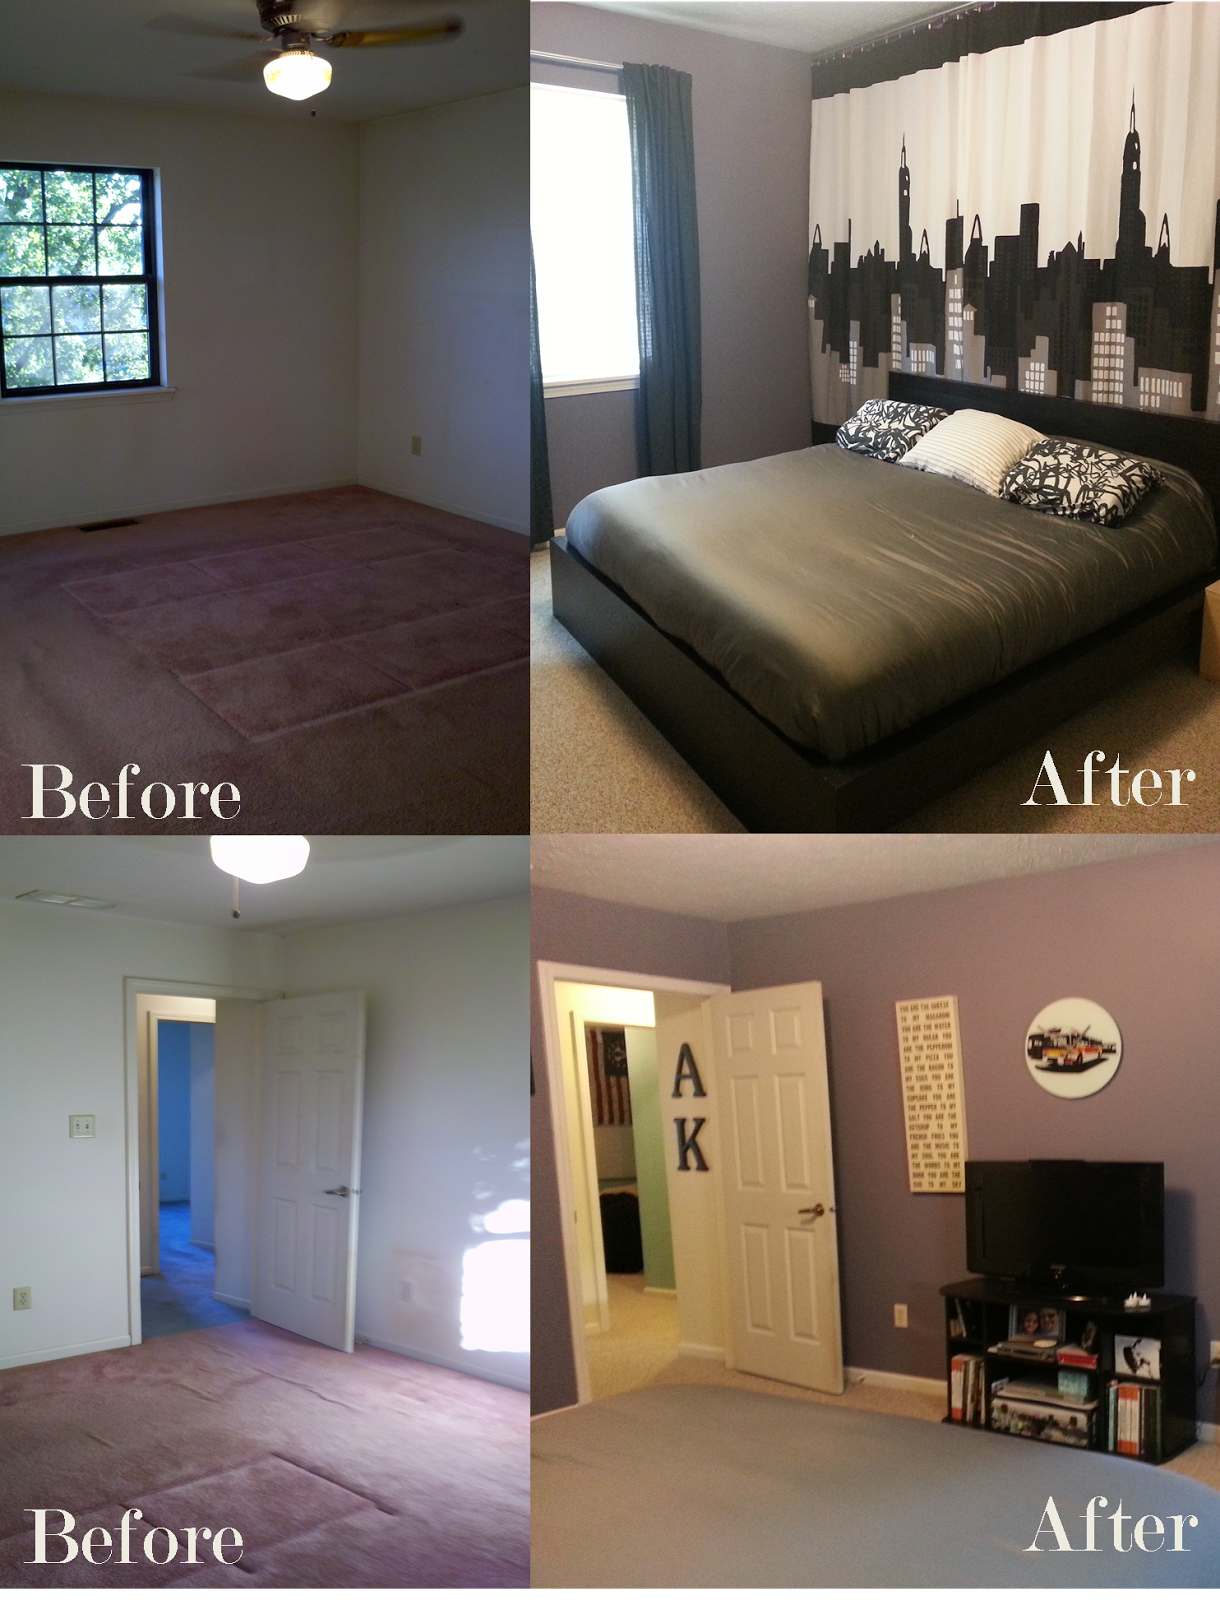
These are just a couple after pictures that weren’t really covered in the before stage. The top one shows the hallway leading from our kitchen to our front door. We had to replace the louvered doors for the utility room and took off the laundry room doors to move in the washer and dryer. Getting the doors back up took much longer than it should have, but the hallways looked so much neater once we did.

The second picture shows the wall at the top of the stairs, in between the game room and the linen closet. This wall is also what you see as you exit the hall bath. It was a boring nothing sort of wall, so we added a bunch of colorful pictures and frames.

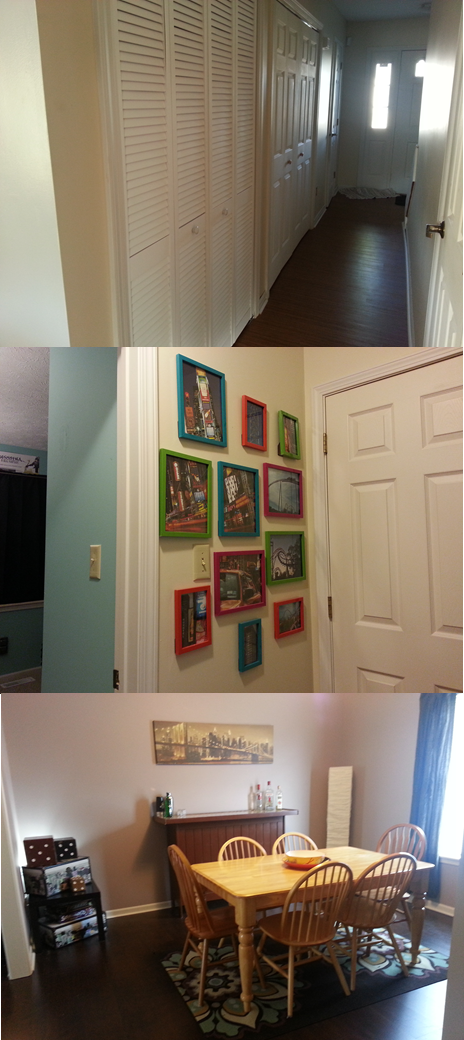
The last photo is shows the other half of the dining room. It’s the same bottlecap bar from our last house. We never know quite what to do with it. For a while, it served as the distinction between our kitchen and family room, but all it did was collect clutter. I like it better in the dining room. To be honest, we don’t use it much. It seems like we should put food on it during our game nights, but that never happens.

Before and After: Kitchen

The kitchen easily took the majority of our time and money, as it should: bathrooms and kitchens are always the biggest investments. Everything in the kitchen is new or has been refinished.

Here’s the list of what we did:

  • Refinished the cabinets
  • Installed new cabinet hardware
  • New stainless steel appliances
  • Installed new kitchen countertops
  • Installed tile backsplash
  • New lighting 
  • New flooring
  • New steel sink
  • New faucet

Before and After: Family Room

The biggest change in this room was renovating the fireplace. After that, we took a while trying to figure out exactly where the furniture should go. We had a hard time deciding where the kitchen should end and where the family room should start. Also, we wanted the fireplace to remain a focal point of the room. Aaron was desperate to mount the TV over the fireplace, but after Dovahfest we decided to leave things mostly where they were.

Before and After: Master Closet

We did a few small things in the master closet that made a huge difference. We changed the light from a single bulb to a modern track light, raised the racks about eight inches, and put our existing dressers inside. These changes allowed us to store more and made the closet look bigger. The light was a miserable hassle to install. It runs on two tension wires, required huge anchors and lots of measuring. However, once we turned it on we were beyond impressed and felt like it was worth the trouble. There’s no picture of the closet from when we first moved in because I didn’t imagine we’d change anything. The before picture was taken when as we raised the closet rack.

I added a bonus picture of the light we installed. It’s the greatest closet light ever. After installing this light, I will always choose similar ones for closets because they’re bright, the tone of the bulbs is a mix of natural and artificial light, and it casts shadows like jewels on the wall. The amazingness of this light doesn’t come across in pictures as well as it does in person. It’s a random thing to gush over, but it is my favorite light in the house. 

Before and After: Stairs

I have much more to say about the stairs, but here’s a quick before and after. Depending on the lighting, the carpeting on the steps was either a dingy blue-grey or an unsusally bright blue. I’m against carpeting on stairs anyway, regardless of color. It gets dingy, easily wears out, and it’s hard to keep clean. I took off the carpet, knocked down the old bannister, and painted everything.

The stairs are positioned directly inside the front door, so I painted them a light grey and white so they wouldn’t be too imposing. I also switched the handrail to the other side of the steps and did not replace the old bannister on the right.

Before and After: Game Room

This room was tricky. As I mentioned before, this home was smaller than the last, and trying to find a place for everything was a challenge. We didn’t want to set up our former loft in the living room or family room, because we thought the love sac would look out of place. We combined our guest and office furniture from the last house into our second bedroom, and made the third bedroom into a dedicated gameroom.

It’s a bit cluttered, but in a happy gaming cave kind of way. Though there is no curtain up in the picture, I usually have a blackout curtain over the window. We mounted the TV and hung lots of shelves to get as much space as possible. Our media shelves fit perfectly in the closet, so we were able to store almost all the games and accessories in this room.

Before and After: Office

The office was the last room to be finished. This room served as temporary storage (aka dumping ground) for everything that was still packed or unused. We got rid of a lot of stuff while living here, as this home was smaller with no storage room. After a few trips to Goodwill, this room was ready to go. (The closet is a different story.) As a side note, I started pulling up the carpet before I remembered to take pictures.